


Game Information
Adelaide Oval
| fourth Quarter | |||
|---|---|---|---|
| Time | Team | Play | Score |
| 30:06 |  | W. Rioli Behind | 94 - 63 |
| 28:43 | | C. Rozee Goal | 93 - 63 |
| 26:20 | | W. Rioli Goal | 87 - 63 |
| 23:10 | | X. Duursma Goal | 81 - 63 |
| 18:16 |  | D. Martin Goal | 75 - 63 |
| 16:50 | | F. Evans Goal | 75 - 57 |
| 14:43 | | S. Powell-Pepper Goal | 69 - 57 |
| 10:26 | | J. Horne-Francis Behind | 63 - 57 |
| 8:01 | | S. Banks Behind | 62 - 57 |
| 5:36 | | Rushed | 62 - 56 |
| 1:19 | | Rushed | 61 - 56 |
| third Quarter | |||
| Time | Team | Play | Score |
| 25:25 | | X. Duursma Behind | 61 - 55 |
| 23:12 | | J. Horne-Francis Behind | 60 - 55 |
| 21:28 | | C. Rozee Behind | 59 - 55 |
| 19:21 | | F. Evans Goal | 58 - 55 |
| 18:06 | | S. Banks Goal | 52 - 55 |
| 15:37 | | D. Byrne-Jones Behind | 52 - 49 |
| 11:14 | | J. Short Behind | 51 - 49 |
| 10:13 | | Rushed | 51 - 48 |
| 9:04 | | W. Rioli Behind | 50 - 48 |
| 4:54 | | D. Rioli Goal | 49 - 48 |
| 3:53 | | T. Nankervis Behind | 49 - 42 |
| 1:11 | | D. Byrne-Jones Goal | 49 - 41 |
| second Quarter | |||
| Time | Team | Play | Score |
| 30:07 | | D. Martin Behind | 43 - 41 |
| 29:30 | | Rushed | 43 - 40 |
| 28:47 | | J. Finlayson Behind | 42 - 40 |
| 25:52 | | I. Soldo Goal | 41 - 40 |
| 22:23 | | S. Bolton Behind | 41 - 34 |
| 21:10 | | T. Taranto Behind | 41 - 33 |
| 19:02 | | F. Evans Goal | 41 - 32 |
| 17:09 | | N. Balta Behind | 35 - 32 |
| 14:31 | | Rushed | 35 - 31 |
| 12:27 | | J. Graham Behind | 34 - 31 |
| 10:01 | | S. Bolton Behind | 34 - 30 |
| 7:26 | | D. Houston Goal | 34 - 29 |
| 5:38 | | C. Rozee Behind | 28 - 29 |
| 2:50 | | J. Bauer Goal | 27 - 29 |
| 1:55 | | T. Taranto Behind | 27 - 23 |
| first Quarter | |||
| Time | Team | Play | Score |
| 34:36 | | S. Powell-Pepper Behind | 27 - 22 |
| 32:43 | | O. Lord Goal | 26 - 22 |
| 29:53 | | S. Bolton Goal | 20 - 22 |
| 27:12 | | W. Rioli Goal | 20 - 16 |
| 22:27 | | W. Rioli Behind | 14 - 16 |
| 18:47 | | O. Lord Goal | 13 - 16 |
| 15:07 | | J. Graham Goal | 7 - 16 |
| 13:05 | | S. Banks Behind | 7 - 10 |
| 9:25 | | N. Balta Behind | 7 - 9 |
| 7:57 | | S. Powell-Pepper Goal | 7 - 8 |
| 5:18 | | D. Houston Behind | 1 - 8 |
| 2:20 | | S. Bolton Goal | 0 - 8 |
| 1:49 | | Rushed | 0 - 2 |
| 1:11 | | S. Bolton Behind | 0 - 1 |
The Brownlow Medal is the highest individual honour in the AFL. In 2026, ESPN is giving you an advantage with our one-of-a-kind predictor.
On the ESPN Footy Podcast, Jake Michaels says St Kilda has a battle on its hands to keep Nasiah Wanganeen-Milera at Moorabbin long term.
Join ESPN's footy team for some of the best AFL analysis and insight on the ESPN Footy Podcast.
Adelaide great Tony Modra has avoided serious brain injury after a life-threatening truck accident, says fellow club icon Mark Ricciuto.
Round 16 of the 2026 AFL season kicks off with a Thursday night blockbuster between Brisbane and Sydney at the Gabba. Then, on Friday evening, Hawthorn and GWS clash at the MCG.
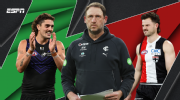
The Josh Fraser hype train keeps gaining momentum at Carlton, and Luke Jackson looks almost unstoppable. But should the Saints be worried about their finals chances? Here's whose stocks are up and down after Round 15.
| POS | Team | Pts. | % | Form |
|---|---|---|---|---|
| 1 |
 FRE FRE
|
52 | 144.4 | WWWWW |
| 2 |
 SYD SYD
|
48 | 143.7 | WLWWW |
| 3 |
 HAW HAW
|
38 | 113.5 | LWWLW |
| 4 |
 GEEL GEEL
|
36 | 120.6 | WLLWL |
| 5 |
 ADEL ADEL
|
36 | 113.2 | WLWWW |
| 6 |
 MELB MELB
|
36 | 104.2 | LLWWL |
| 7 |
 WB WB
|
36 | 92.8 | WWWLW |
| 8 |
 BL BL
|
32 | 108.4 | LLLWW |
| 9 |
 SUNS SUNS
|
28 | 105.3 | WLLLL |
| 10 |
 NMFC NMFC
|
28 | 90.7 | LWLWW |
| 11 |
 COLL COLL
|
26 | 101.5 | LWLLW |
| 12 |
 STK STK
|
24 | 100.6 | LLLWL |
| 13 |
 GWS GWS
|
24 | 100.3 | LWWLL |
| 14 |
 CARL CARL
|
24 | 91.1 | WWWWW |
| 15 |
 PORT PORT
|
16 | 98.7 | LLWLL |
| 16 |
 WCE WCE
|
16 | 72.7 | WLWLL |
| 17 |
 RICH RICH
|
8 | 61.3 | LWLLL |
| 18 |
 ESS ESS
|
4 | 70.4 | LLLLL |